Sunday, September 30, 2012

Doily of the Week #34

Today I finished this black doily. Perfect timing as Halloween is only one month away!


I’m going to use this doily as a centerpiece. I placed the doily on a charger plate and added a ceramic pumpkin that I bought last year from a dollar store. I might replace the pumpkin with a real one and add more details.


I’m very pleased with the way this doily turned out.

Unfortunately, the link to the pattern doesn't work anymore.

I'm linking to Make It Pretty Monday at The Dedicated House,
Show and Tell Friday @ My Romantic Home

Wednesday, September 26, 2012

I’m Back to Blogging and Crocheting

Hello! I am back from my two-week vacation in Europe. It was a lot of fun, but it’s nice to be home now. I have many crochet projects on hold. But before I can get to them, I have lots of house chores to do.


I took the picture above in a beautiful tea room in Krakow, Poland. That pineapple doily looks quite charming.

If you would like to read about the places I traveled to, visit my other blog.

Monday, September 24, 2012

Doily of the Week #33

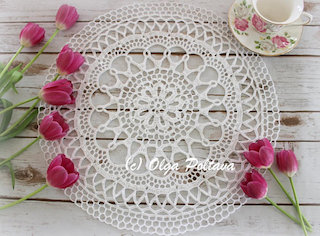
This doily is called Autumn Reflections. The original one was made in yellow, and it did remind me of autumn. I made mine in white and as I look at it, I think about the summer that is almost over. So I refer to this doily as Summer Farewell.


The pattern is here -->  Autumn Reflections Doily Free Pattern

Monday, September 17, 2012

Doily of the Week #32


Doily of the Week is back, but I am away on vacation. I have this and another doily post to be posted automatically.


This small doily is extremely simple and easy to make. But sometimes the simplest things are the most charming.


Ferris Wheel Doily Free Pattern (it's a vintage pattern from A Book of Crochet, Book #52, 1935)


Ch 8, join with sl st, ch 5. 1st rnd: 23 tr under ring, join to ch-5 with sl st. 2nd rnd: Ch 5, s c in top of every other tr with ch-5 between, ch 5. 3rd rnd: 3 tr under each ch-5 with ch-3 between, ch 3, s c under ch-5, ch 5. 4th rnd: S c in each 2nd tr and under each ch-3, with ch-5 between, ch 5. 5th to 8th rnds incl: S c under each ch-5, with ch 5 between; sl st to next ch-5, ch 5.

9th rnd: 5 tr under each ch-5, with ch-3 between (count 1st ch-5 as 1 tr), ch 3, sl st under 1st ch-5, ch 5. 10th rnd: S c in each 3rd tr and under each ch-3, with ch-5 between, ch 5. 11th to 13th rnds incl: S c under each ch-5, with ch-5 between. 14th rnd: S c under each ch-5, with ch-7, s c in 3rd ch from hook, ch-4 between. This doily may be made larger if desired by increasing the number of ch-5 rows before the final picot edge.


Monday, September 10, 2012

Clone Knot


The pattern for hydrangea flowers in my previous post requires making a clone knot for the center of the flower. That was a new crochet stitch for me. I searched the Internet in hope to find a good tutorial. Usually the video ones are the best for me. However, clone knot videos that I found on Youtube didn’t make any sense to me.

I searched the Internet farther in hope to find good written instructions. The only article that was useful to me was from this blog.

I believe there is more than one variation for clone knot. The one I learned worked fine for my hydrangea flowers.

How to Make a Clone Knot


Thursday, September 6, 2012

Better Hydrangea Flowers

I want to thank you for your comments and suggestions on how to improve my hydrangea flowers. Alipurr from Kitten Yarn improved my original pattern and came up with a lovely flower, which her daughter turned into a hairclip. You can see it here.

And Cheri from Crochet Partners Yahoo group sent me a link to another hydrangea pattern shared by Camelia Shanahan on her blog. I loved that pattern and quickly set to work on my new hydrangea flowers.

I tried the same purple yarn, but it didn’t work so well for this pattern. My flower came out too big. So I switched to purple and lilac cotton thread and liked the result much better.


The pattern is fairly easy except for one thing – clone knots! I’ve never heard about them until I came across this pattern. I had to search the Internet to learn how to make them (I will make a post about clone knots later).

Once again, thank you all for your kind help. And big thanks to Camelia Shanahan for her pattern.

Crochet Hydrangea Flowers Free Pattern

I am linking this post to the following link parties:

Tutorials, Tips, and Tidbits at Stone Gable,
Show and Tell Friday @ My Romantic Home
Potpourri Friday @ 2805.


Saturday, September 1, 2012

Hydrangea Inspired Flowers


I love blue and purple hydrangea and was inspired to make crocheted hydrangea flowers. I used purple 100% acrylic yarn.
I am somewhat disappointed!


My flowers turned out pretty enough, yet they don’t quite look like hydrangea. The pearl beads are too big for my flowers (I didn’t glue them on, just laid them on for the picture). Next time I am at a crafts store, I should look for smaller purple or blue beads for my flower centers. The shape of the petals is not right either. The hydrangea petals are somewhat pointy, but I didn’t know how to achieve that effect in my crocheted flowers.


Here is the pattern anyway in case someone likes them. It’s extremely easy.

Ch 5, join with a slip stitch to make a ring.

*Ch 3, 2 tr in ring, ch 3, sc in ring* repeat from * three  times. Fasten off.


~~~~~~~~~~~~~~~~~~~~~~~~~~


Crochet Patterns from my Shop